Creating a Wi-Fi Hotspot with Windows Hostednetwork
Windows tools only - no third-party software required!
Ever needed to share an ethernet or 3G/4G connection from your laptop to your wireless devices (e.g. Android tablets, phones, iPods and iPads)? There's no need to hassle with 3rd party tools like Connectify to turn your Windows 7/8 laptop (or desktop, if you really prefer) into a secure Wi-Fi hotspot in a cinch!
The Brief
We're going to use the command netsh wlan set hostednetwork mode=allow ssid=*NAME* key=*PASS* to set up a Wi-Fi hotspot, and then turn it on with netsh wlan start hostednetwork and off with netsh wlan stop hostednetwork.
Then, we'll share the internet connection by going into Internet Connection Sharing and hooking it up to our hotspot.
The Setup
Alright. Of course, we'll need a Windows 7 or newer machine. We'll also need a Wi-Fi adapter (the thing you use to connect to Wi-Fi networks. Pretty much all laptops have one built in, and if you're on a desktop, well, you should know what to get). We'll also need Administrator access (if you own the machine, you probably have it) and the command line
(Don't worry, it's not scary, at least for the things we're doing here).
Let's get the non-intuitive parts of this out of the way first. For that, we'll need to open an Administrator's Command Prompt. (Don't worry, we won't be deleting your files or anything like that! If you'd like, you can read up on the commands we'll be executing here!)
On Windows 7
Click the Start button, and type in "cmd" (without the quotes, of course) into the search area. "Command Prompt" should show up. Right-click it, and hit "Run as Administrator." Accept the request for permission, and you're done!
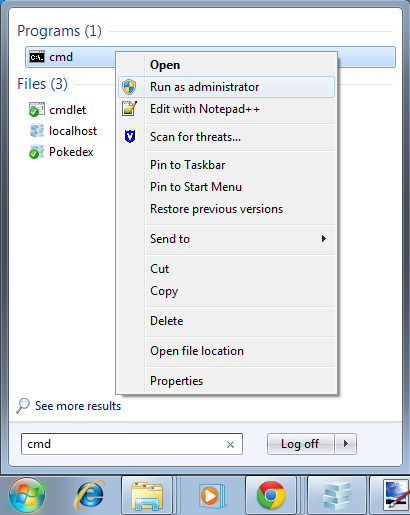
(A neat tip - if you have it selected using the keyboard, you can hit Control-Shift-Enter to run the application as Administrator as well!)
On Windows 8/10
It's even easier to do in 8 than in 7! Just right-click the bottom-left corner, and there'll be an option called "Commmand Prompt (Admin)". Click it, accept the request for permission, and you're done!
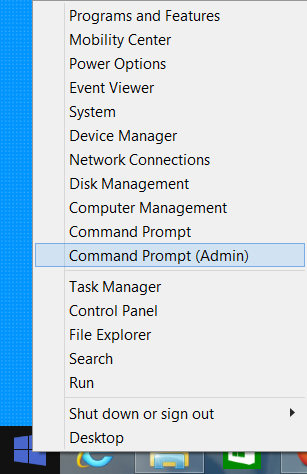
We should see something like this...
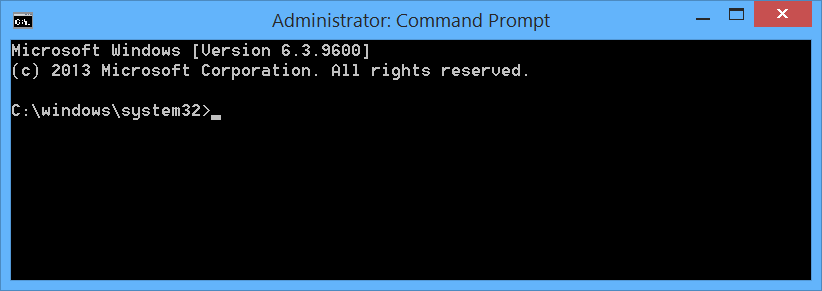
...feel daunting? Yeah, it's harder to use than the nice clicking and pointing we get in normal applications, but it's not that bad. It grows on you.
Anyways, we'll just be typing in one command (for now). There's one more you use to toggle the hotspot on and off, but we'll save that for later. This is where we'll configure our hotspot's settings, so start thinking of a clever name and password!
Got it? Awesome. Well, here's the format of the command:
netsh wlan set hostednetwork mode=allow ssid=YourWifiName key=YourWifiPassword!
Yeah, that's it. Just switch out what you thought of for your Wifi hotspot with the blue text in the box above, and you have your finished command! Type it into the Command Prompt, and hit Enter! Your Wi-Fi hotspot is now configured! It'll spit out a few lines of output at you after a few seconds, and we'll type in one more simple command (I guess I kinda lied about that one command thing, but this is it!) to start the hotspot.
netsh wlan start hostednetwork
(For instance, to set up a Wi-Fi called "Aura" with the password "Lucario!"):
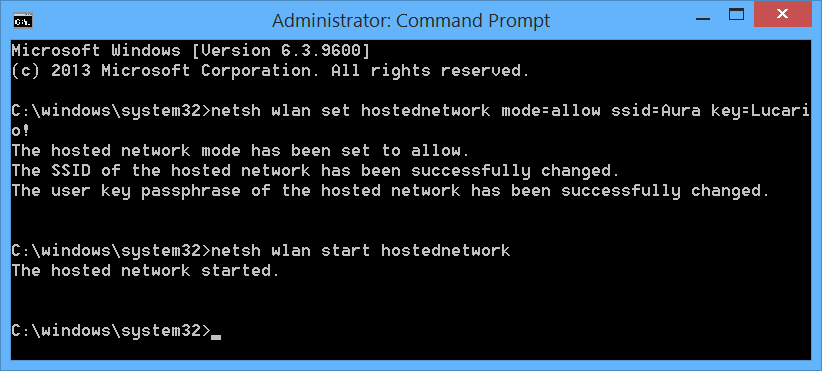
We have an active Wi-Fi hotspot now! We're not quite done yet, though, since we still have to share our internet connection, but we're pretty close! (We are done with the Command Prompt, but leave it open for later)
We need to get to Windows's network sharing settings, which is a light trek through a few menus. Here's a map of where you need to go.
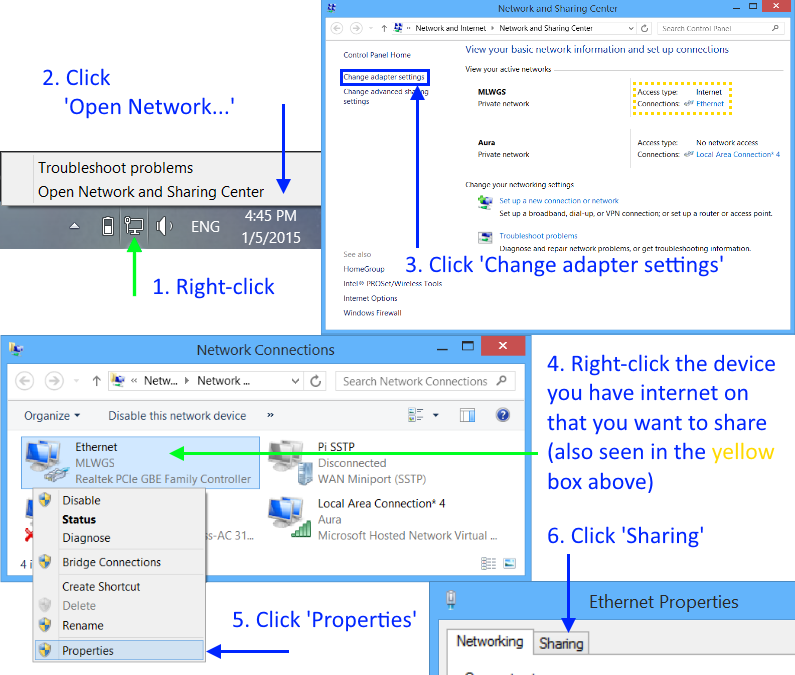
Essentially, we are opening the Network Sharing Center by right-clicking on our network connection, going to the adapter settings, then going to the properties of the adapter on which we currently have internet on, and finally, clicking the sharing tab of the properties window. Not too bad when put this way now, is it?
Under the Sharing tab, we'll need to check the boxes on the left-hand side, and under "Home networking connection", choose the adapter that is labelled "Local Area Connection". (Got multiple? You can figure out which one is the one you need by looking under "Network Connections" as shown in the above picture - It'll be the one with your Wi-Fi name under it).
It may be tempting, but do not choose Wi-Fi. It won't work.
Again, here's another example:

Click 'OK', and we're finally done! Surf to your heart's content (or if you're sharing cellular data, I guess until you run out of data).
Once you're done with the hotspot (remember that Command Prompt you left open? If you closed it, you can just open a new one), we'll issue one more command to tell the computer to shut the hotspot down.
netsh wlan stop hostednetwork
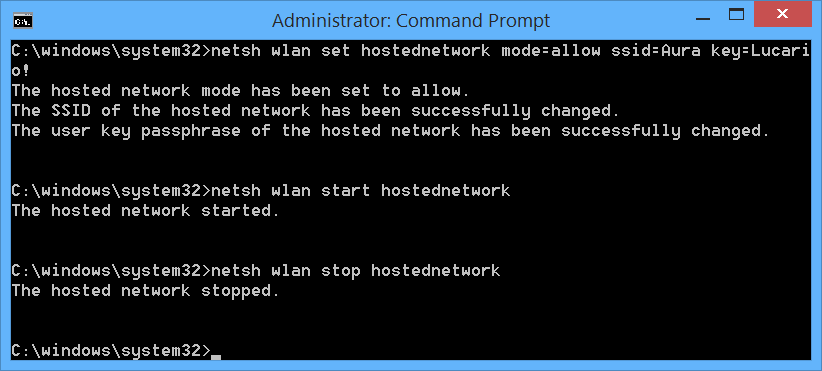
Makes sense, doesn't it? That's all for this tutorial! Feel free to send me an email if you have any questions, or ask me on Google+!
